

by Diego Sanchez
April 01, 2019
Diego prevents carpal tunnel syndrome in designers worldwide by making incredible time-saving Photoshop actions and mock-ups.
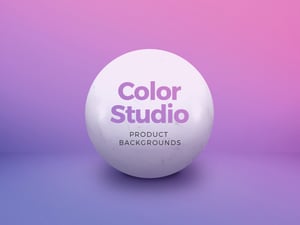

Place Any Product Realistically on a Solid Color Background
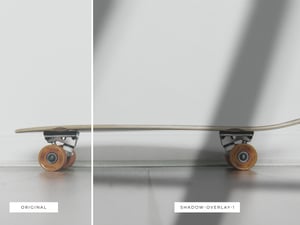
Casting Shadows in Photoshop
When you need to place a product on a solid background in the most realistic way, you have to consider the light source and how the object shape interacts with the light to cast its shadow on the surface. A sphere is the best way to understand how shadows interacts with an object because it has a full range value (darkness to lightness); it's easy to locate where the light source is and therefore where the cast shadows should be on your background.
The Basics
Before starting this tutorial, let´s take a look at some of the basic aspects of the light and shadow and how doing a prior analysis to detect the object lights, midtones and shadows will make the ground shadows placement a lot easier. In the following image you can see where the highligths are as well the object core shadow and the reflected lights of the surface.

After analysing the object and discovering the light source it is just a matter of knowing the technique (and a bit of common sense) to properly make the object shadows quickly and easily.

If you are just starting it could be hard to see some of the parts in a real object, but it is easier to see the different parts on a sphere. In this basic example you can see the different parts of the lights and shadows in a clear way.

When placing products realistically on a background, we must pay special attention to the Highlight and the Core Shadow of the object (as well if there are any reflected lights from the surface), because those 2 points will tell us the light angle to make our Cast Shadows in the surface.
Step 1
Open Photoshop, and in a new file with a white background place your already isolated object in a new layer. In this case I will use the sphere to better show how to make the cast shadows according to the light source for a more realistic object placement.

Step 2
As our object is a sphere, the shadow will be a circle, but as the light source is coming from the top left at an approximated angle of 140º, the cast shadow will be an oval.

Step 3
Select the Ellipse Tool (U), be sure to have the tool mode set to Shape (in case you need to adjust the shape after you draw it) in the top toolbar and draw an oval shape as shown. Tip: Start the oval shape where the Light Reflection starts and go a bit far from the object (almost 2 times the object size)

Step 4
Go to Layer > Rasterize > Layer and then go to Filter > Blur > Gaussian Blur. Set the Radius to 16 pixels and click OK.

Step 5
With the Ellipse layer selected, bring down the Opacity to around 20%.

Step 6
Again, select the Ellipse Tool (U), be sure to have the tool mode set to Shape in the top toolbar and draw an oval shape as shown. Tip: Start the oval shape where the Light Reflection starts and go a bit far from the object (almost 1.5 times the object size)

Step 7
Go to Layer > Rasterize > Layer and then go to Filter > Blur > Gaussian Blur. Set the Radius to 16 pixels and click OK.

Step 8
With the Ellipse layer selected, bring down the Opacity to around 75%.

Step 9
One more time, select the Ellipse Tool (U), be sure to have the tool mode set to Shape in the top toolbar and draw an oval shape as shown. Tip: Start the oval shape where the object touch the ground and go a bit far from the object (almost 1 time the object size)

Step 10
Go to Layer > Rasterize > Layer and then go to Filter > Blur > Gaussian Blur. Set the Radius to 16 pixels and click OK.

Step 11
With the Ellipse layer selected, bring down the Opacity to around 15%.

Step 12
Select the Pen Tool (P), be sure to have the tool mode set to Shape in the top toolbar and draw a kind of flattened bean shape on top of the 3 shadows we did using a white color as shown. Note: This shape will become part of the light coming from the back of the object which will add more realism to our cast shadows.

Step 13
Go to Layer > Rasterize > Layer and then go to Filter > Blur > Gaussian Blur. Set the Radius to 8 pixels and click OK.

Step 14
With the Shape layer selected, bring down the Opacity to around 5%.

Some Final Notes
Now that you learned how to look at the lights and shadows of an object to realistically place it on a solid color background, you can use this same method on any other object you can think of and make any type of background for your object like following one I did for the sphere.


Comments