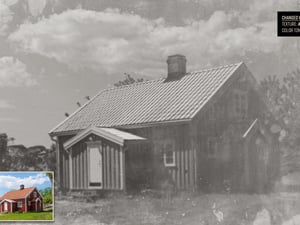
How to Make a Nude Tone Effect in Photoshop
Photoshop Post Processing
If you're on Instagram, Pinterest or if you read fashion blogs often you probably noticed that Brown and Beige tones are present in almost all images. These color tones, which are trendy right now, are perfect to achieve a natural and soft look while a minimalist feel is present. If Converting any of your images to this trendy look & feel in Photoshop is very easy and it only requires that you have the Camera RAW Filter installed. Although the values we will use to create a nude tone effect in this tutorial may not be perfect for your particular image, they can be used as a good basis for any image, and then you can adjust each of those values to fine-tune your end result because we will use a non-destructive process.
But before we begin, and if you want to follow this tutorial exactly as described, please download the following image from Pexels: Download
Step 1
Open your image in Photoshop.

Step 2
Go to Layer > Smart Objects > Convert to Smart Object. Note: We only do this just in case you want to go back and change some settings after the effect has been applied.

Step 3
Go to Filter > Camera Raw Filter.

Step 4
Expand the Basic tab and apply the following values.

Step 5
Go to the Tone Curve tab, and in the Point Curve tab add 3 extra curve points as shown.

Step 6
Select each pont in the curve and apply the following basic values.

Step 7
Next, click on each of the Red, Blue and Grenn channels and add 1 more point with the following values.

Step 8
Go to the Detail tab and apply the following values.

Step 9
Now, expand the Color Mixer tab and under "All" apply the following values.

Step 10
Expand the Color Grading tab, select the Shadows and apply the following values.

Step 11
Still in the Color Grading tab, select the Highlights and apply the following values.

Step 12
Expand the Calibration tab and apply the following values.

Step 13
Lastly, and if you plan to use this effect on various pictures, a good idea is to save it as a preset. To do that, simply go to the Presets tab, click on the “More Preset Options” icon and select "Create Preset". Give the preset a name and click OK.

Step 14
The next time you want to use this effect on a picture, simply open the image, go to the Camera Raw Filter, go to the Presets tab, and under “User Presets” click on the new created preset to apply it like I did in the following one.

Some Final Notes:
If you want to edit the Camera RAW values, in the Layers Panel expand the layer effect and double click on the Camera Raw Smart Filter. Once in the Camera Raw window, adjust the values as you wish and click the OK button.


Comments