

by Diego Sanchez
March 23, 2020
Diego prevents carpal tunnel syndrome in designers worldwide by making incredible time-saving Photoshop actions and mock-ups.
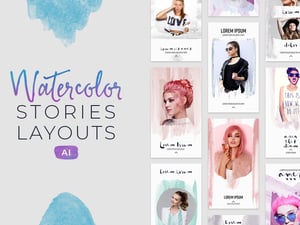

How to Make Your Own Instagram Template
Instagram Templates in Photoshop
Back in 2010 Instagram was released as a simple Photo Sharing App, but over the years it has become one of the most relevant social networks for sharing imagery, and to promote products and events (for better or worse). Today, you will learn how easily you can make your own Instagram Post Template in Photoshop to be used an unlimited number of times with any image, any text and any colors you want. Best of all, you'll once you've got it it will take less than 5 minutes to make your quotes or brand promotions look professional.
Step 1
Open Photoshop and make a new file at 1080 x 1080 px, which is the standard Instagram Post size.

Step 2
Go to Layer > New Fill Layer > Solid Color. Name this layer as "Background Color" and click OK.

Step 3
In the Color Picker window, pick any color you want for your background and click OK. In this case i will choose white.

Step 4
Select the Rectangle Tool (U), be sure to have the mode set to "Shape" in the top toolbar and click once over the artboard. Set the Width and Height to 180px and click OK.

Step 5
Rename this layer to "Logo Background" and place the square at 50 px from the bottom edge and 50 px from the left side of the Artboard as shown.

Step 6
Make another rectangle following the same procedure, but this time set the Width to 800 px and the Height to 180 px.

Step 7
Rename the layer to "Address Background" and place it right next to the square shape as shown.

Step 8
Again, make another rectangle, this time set the Width to 980 px and the Height to 800 px. Place it right above the last 2 shapes as shown.

Step 9
Rename this layer to "Image" and go to Layer > Smart Objects > Convert to Smart Object.

Step 10
Now draw the last rectangle at 880 px x 150 px and place it centered at 100 px from the top edge of the Artboard as shown.

Step 11
Rename this layer to "Main Text Background".

Step 12
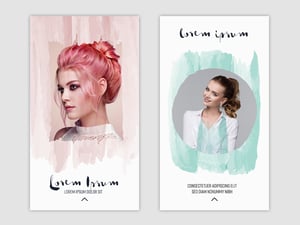
Select the Horizontal Type Tool (T) and using any font you want write your main text. In this case, I will simply set the text to "Lorem Ipsum" using Montserrat at 90 pt with the color set to #878787.

Step 13
With the Type Tool still selected, write the text you want to place in the "Address background" space. In this case, using Montserrat at 30 pt I will simply write "www.yoursite.com".

Step 14
Lastly, place your logo over the "Logo Background" space (which in this case is a simple "M" letter).

Step 15
With the template ready, it is time to place the image and set the background colors. First, double click on the "Image" layer thumbnail.

Step 16
In the new window place the image you want to use on your Instagram Template. Go to File > Save and close the file (the image will be updated in the original document).

Step 17
Double click on the "Logo Background" layer thumbnail. In the Color Picker window choose any color you want and click OK.

Step 18
Now, double click on the "Address Background" layer thumbnail. In the Color Picker window choose any color you want and click OK.

Step 19
Lastly, double click on the "Main Text Background" layer thumbnail. In the Color Picker window choose any color you want and click OK.

Conclusion
By making your own Instagram Template following the steps described here you can now easily update your image as well the text and colors without having to make the entire design again and have your instagram Post ready in less than 5 minutes.


Comments