

by Diego Sanchez
January 20, 2020
Diego prevents carpal tunnel syndrome in designers worldwide by making incredible time-saving Photoshop actions and mock-ups.


How to Make a Sliced 3D Text Effect in Illustrator
Illustrator Text Effects
In Illustrator, there are many different ways to make a sliced text effect. You can use the Pathfinder, the Knife Tool and even the Appearance Panel to slice your text, but! there's a faster and more precise way. The lesser known method involves the Shape Builder Tool. Today, you will learn not only how to easily slice your text in Illustrator, but also how to give it a 3D effect. The tradeoff is that it's destructive (you can't edit the text after slicing it), but it is fast and easy to make.
Step 1
Open Illustrator and make a new file at any size you want. In this case, I will make mine at 1920 x 1080 px.

Step 2
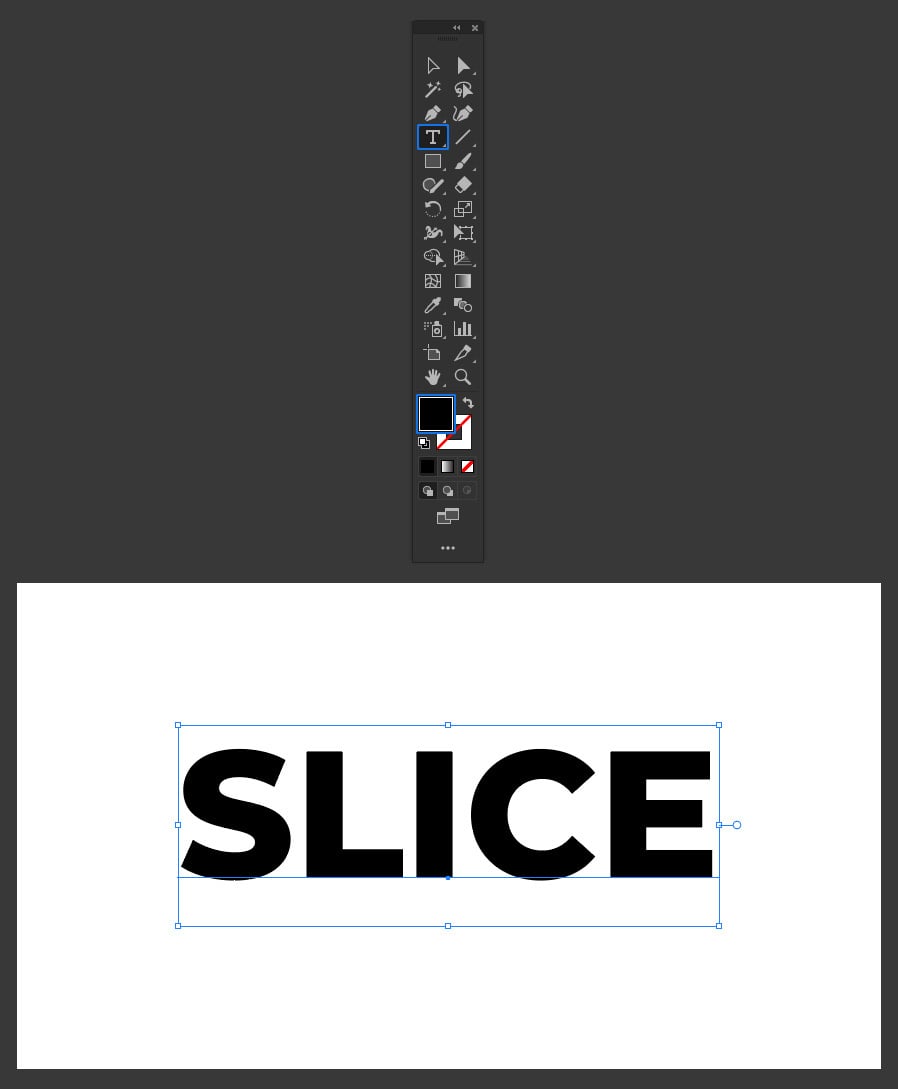
Select the Type Tool (T) and type your text using a black color and any font and size you want. I will write "SLICE" using Montserrat Extra Bold at 400 pt.
Step 3
With the Selection Tool (V), select your text and go to Type > Create Outlines.

Step 4
Select the Line Segment Tool (\) and draw a line where you want to cut your text as shown.

Step 5
Press Ctrl+A on your keyboard to select all and pick the Shape Builder Tool (Shift+M).

Step 6
Click once over all the bottom parts you will be slicing as shown.

Step 7
With the Selection Tool (V), select all the loose lines and delete them.

Step 8
Press Ctrl+A on your keyboard to select all and go to Object > Ungroup.

Step 9
Select all the bottom parts of your text and move it a bit to the left and down.

Step 10
Again, press Ctrl+A on your keyboard to select all, press Ctrl+G to group it and go to Effect > 3D > Extrude & Bevel.

Step 11
In the 3D & Bevel window, apply the following settings and click OK.

Step 12
Go to Object > Expand Appearance and then to Object > Ungroup.

Step 13
With the Selection Tool (V), while holding the Shift key on your keyboard, select all the front parts of your text as shown and set any fill color you like. In this case, I will set the color to #fff647.

Step 14
Now, select all the side parts, and again, set any fill color you like. For this one, I will set the color to #00a99d.

Step 15
Now, select the remaining parts ans set the fill color to any other you want. In this case, I will set the fill color to #ff00ff.

Step 16
Press Ctrl+A on your keyboard to select all, go to Window > Stroke and apply the following values.

Step 17
From now on, you can make any other changes to your text style, like the drop shadow we will do next. Again, select all the front parts of your text with the Selection Tool (V) and go to Edit > Copy and then to Edit > Paste in Place.

Step 18
Set the fill color to black and remove the stroke.

Step 19
Move the text down until it touch the bottom part of your text as shown.

Step 20
Go to Object > Arrange > Send to Back.

Step 21
Lastly, go to Effect > Stylize > Drop Shadow. Apply the following values and click OK.


Comments