
by Diego Sanchez
August 07, 2019
Diego prevents carpal tunnel syndrome in designers worldwide by making incredible time-saving Photoshop actions and mock-ups.

Design Your Own Polygon Art
Making a Low Poly Image in Photoshop
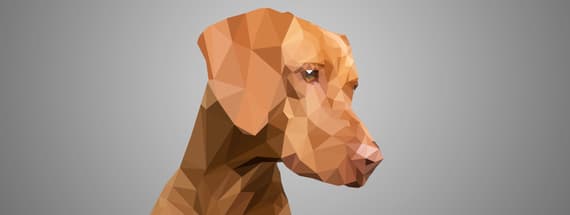
Polygon Art (aka Low Poly) has become super popular due its minimal yet three dimensional look. Fortunately for us, the technique to achieve this effect in Photoshop is simple (though it does take some time due all the triangles in the final image must be made by hand).
It is a very simple, yet repetitive, process that is very time consuming. But it worth to see the final result and all the uses that the final image can have. Feel free to use any image you want to follow this tutorial, but if you want to use the same image I’ve used here you can download it from Pixabay: Download.
But if you are not looking for a precise (human made) polygon art, you can check the Low Poly Photoshop Action end results right at the end of this tutorial which makes the work very simple.
Step 1
Open the image you want to convert to a Low Poly one in Photoshop.

Step 2
Select the Polygonal Lasso Tool (L) and make a rough selection around your subject.

Step 3
With the selection active, go to Edit > Copy and then to Select > Deselect.

Step 4
Go to Layer > New Fill Layer > Solid Color. Name this layer as “Background Color” and click OK. Set the color to #A9A9A9 and click OK.

Step 5
Go to Edit > Paste Special > Paste in Place.

Step 6
Rename this layer to “Polygon”.

Step 7
Select the Polygonal Lasso Tool (L) and make a triangular selection on the area of your interest trying to select an area of a similar color. It is a good idea to start on those parts where smaller triangles are needed in order to have more detail and then move to the larger areas.

Step 8
With the selection active, go to Filter > Blur > Average.

Step 9
With the Polygonal Lasso Tool (L) still selected, make another triangular selection next to the one you did. Always aim to start the next selection on the same vertices of you last one.

Step 10
Now simply press Ctrl+Alt+F to apply the blur filter again to this new area.

Step 11
Now you should repeat this same process (triangular selection + average blur) on your whole image. Remember to save the file once in a while.

Step 12
Try to make different triangle sizes to make the end result looks better.

Step 13
Once you finish, and as our Low Poly art is on his own layer, you can now move it, scale it, add some background lights, adjustment layers, change the background color or just use it as is.

Some Final Words
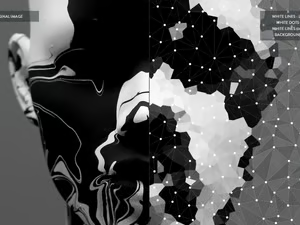
As you see, making Low Poly art in Photoshop does require some work, but there is also a more easy way to achieve the same effect (although not so precise as a hand made one) by using the Low Poly Photoshop Action available here at Medialoot. The action comes with 4 different low poly sizes (small, medium, large and extra large) and 2 different wireframes and dots colors (black and white) to easily make your own low poly images with a single click.
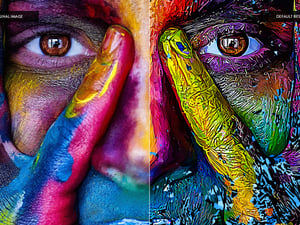
Here is a sample of the “small” and “Medium” Low Poly actions made in less than 2 minutes using the exact same picture of the tutorial.


Comments