

by Diego Sanchez
July 01, 2019
Diego prevents carpal tunnel syndrome in designers worldwide by making incredible time-saving Photoshop actions and mock-ups.


Add a Grunge Texture to Your Photos
Different Methods to add Textures in Photoshop
From time to time (or all the time, if you work with photos on a daily basis) we have to add texture to our pictures to create a new atmosphere or add some drama. Today, I'll show you how to easily add a grunge texture to your photos without touching the original image. Even if you're an advanced Photoshop user and you already know how to add an overlay texture to your images, this tutorial will add more to your toolbox — I'm going to show you 5 different ways, just by changing only a few settings in the Layers Panel.
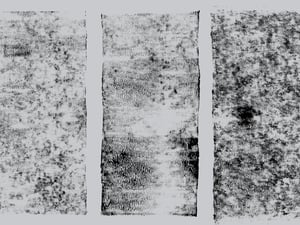
But before we start, and if you want to follow this tutorial exactly as described please download the following assets:
Method 1
Step 1
Open you image in Photoshop.

Step 2
Go to File > Place Embedded. Locate the “grunge-1.jpg” texture file and click on the Place button.

Step 3
Resize the texture if needed to cover your whole image and hit the Enter key on your keyboard to commit the changes.

Step 4
In the Layers Panel, change the Blending Mode to “Hard Mix” and decrease the Fill opacity to 15%.

Method 2
Step 1
Open you image in Photoshop.

Step 2
Go to File > Place Embedded. Locate the “grunge-2.jpg” texture file and click on the Place button.

Step 3
Resize the texture if needed to cover your whole image and hit the Enter key on your keyboard to commit the changes.

Step 4
In the Layers Panel, change the Blending Mode to “Linear Burn” and decrease the Opacity to 25%.

Method 3
Step 1
Open you image in Photoshop.

Step 2
Go to File > Place Embedded. Locate the “grunge-3.jpg” texture file and click on the Place button.

Step 3
Resize the texture if needed to cover your whole image and hit the Enter key on your keyboard to commit the changes.

Step 4
Go to Image > Adjustments > Invert.

Step 5
In the Layers Panel, change the Blending Mode to “Subtract” and decrease the Fill opacity to 35%.

Method 4
Step 1
Open you image in Photoshop.

Step 2
Go to File > Place Embedded. Locate the “grunge-4.jpg” texture file and click on the Place button.

Step 3
Resize the texture if needed to cover your whole image and hit the Enter key on your keyboard to commit the changes.

Step 4
Go to Image > Adjustments > Invert.

Step 5
In the Layers Panel, change the Blending Mode to “Luminosity”, decrease the Opacity to 40% and the Fill opacity to 55%.

Method 5
Step 1
Open you image in Photoshop.

Step 2
Go to File > Place Embedded. Locate the “grunge-5.jpg” texture file and click on the Place button.

Step 3
Resize the texture if needed to cover your whole image and hit the Enter key on your keyboard to commit the changes.

Step 4
Go to Image > Adjustments > Invert.

Step 5
In the Layers Panel, change the Blending Mode to “Screen” and decrease the Opacity to 45%.


Comments